
That Baseball Bat Under the Tree? Here’s How to Disguise It as an Axe
- softballmoms643
- Dec 19, 2025
- 5 min read
Wrapping a bat for Christmas can be a fun challenge, especially if you want to give it a unique twist by making it look like an axe. This creative approach can disguise a bat, which is normally a VERY identifiable shape under the tree, into something that will leave the recipient guessing. Whether you are gifting a baseball bat to your child or a coach (maybe its a fungo bat) wrapping it to look like an axe is the ultimate disguise.
In this post, you will find step-by-step instructions, tips, and creative ideas to wrap a bat so it resembles an axe. We will cover materials, wrapping methods, and decorative touches to make your gift stand out this holiday season.
Materials Needed for Wrapping a Bat as an Axe

Before starting, gather all the materials you will need. Having everything ready makes the process smoother and more enjoyable.
Wrapping paper: Your choice of wrapping paper.
Cardboard or foam board: To create the axe blade shape. I use cardboard for this tutorial because I have a ton of it laying around in the form of shipping boxes.
Scissors and Box Cutter: For cutting paper and cardboard.
Stencil: Click Button below to download and print the axe head overlay to cut your cardboard. This is a hand drawn stencil of an actual axe we have laying around (no its not perfect but what I used for the axe head in this tutorial).
Tape: I used packing tape and then you can use gift wrap tape for wrapping.
Markers or pencil: To make outlines for the axe head.
Optional decorations: Glitter, stickers, or ribbon for extra decoration.
Preparing the Bat and Creating the Axe Blade
We are going to focus on the axe blade, which is the key feature of this wrapping style.
Cut the blade shape
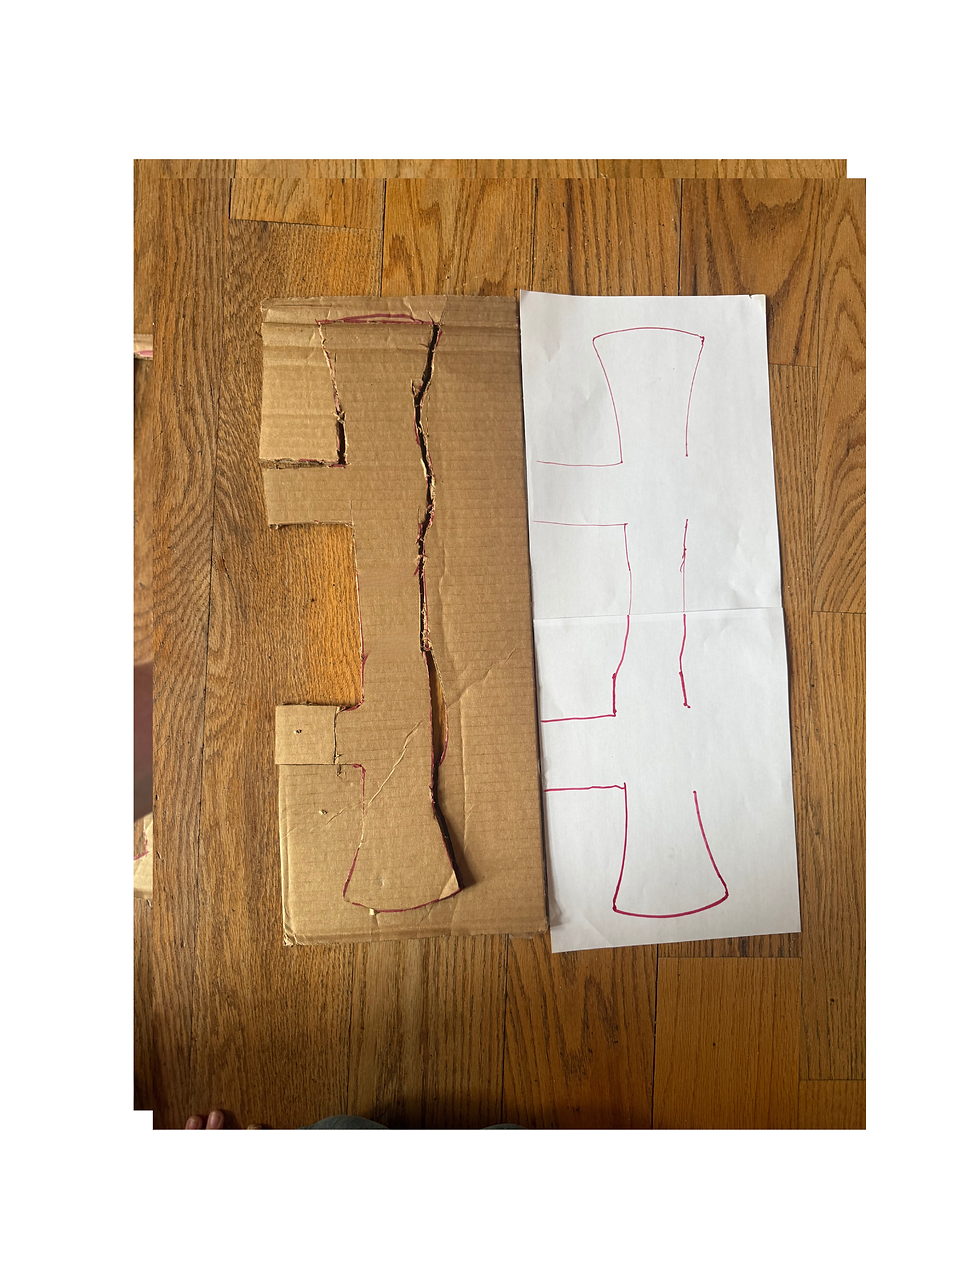
I have a rough sketch of an actual axe head we use around our acreage. You are welcome to print it out here
I recommend printing both pages and taping them end to end. This will be your stencil to cut out the axe head on cardboard. Tape these two connected pages on top of the cardboard and cut through both. The tape will help it not move around while your cutting. I used a box cutter, but you can use some really good scissors to cut the shape out. Just beware of what is underneath your cutout if you are using a box cutter (don't want you to scratch your nice surfaces underneath).
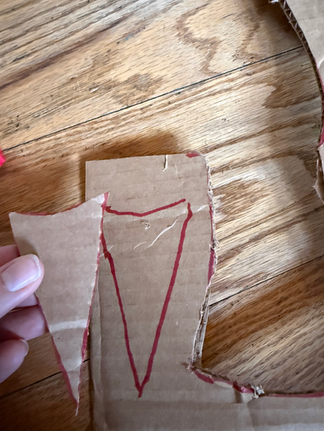
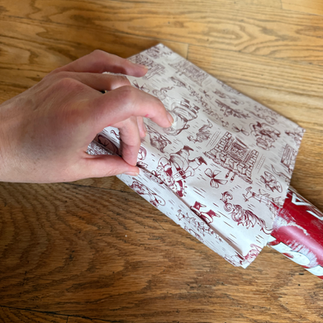
Wrap the cardboard around the end of the bat.
Take the cutout shape and wrap it around your bat end. I leave a little bit of the end of the bat sticking up, past the axe head on top as shown. Try to tape it smoothly across the end of the "blade", and I also make sure to tape down what would be the axe handle to the bat, so there are no rough edges sticking up. Trim up by eye whatever you need to, in order to make the edges a somewhat straight line (doesn't have to be perfect).


Fill in Bat Head Empty Space and Taper Handle.
Next we are going to cut out some more cardboard pieces to fill in the empty areas of the bat head. If you want to just stuff it with newspaper, that is an option too. We did both. We stuffed with newspaper crumpled up and then taped our cutouts on the end, to give a smooth finish.
I also put the middle of a paper towel roll, cut it down the middle to fit the bat handle inside of it. I twisted it until it was somewhat snug and made the taper I wanted and taped it to the bottom of the handle. Doing this disguised the handle a bit more and made it an easier transition to the knob (see the last photo).


Wrapping the Axe/Bat
Wrapping this is a bit tricky, and I'm sure some of you will find a much better way, but I will show you how we did it! I wrapped the Axe Head first, and then wrapped the handle as if I was wrapping grip tape around a bat. Sometimes having to squish excess paper into itself as I rolled it.
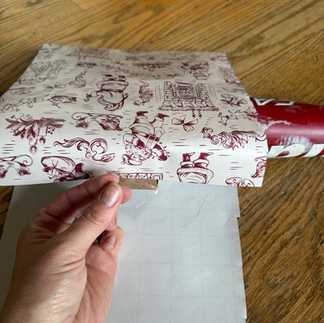
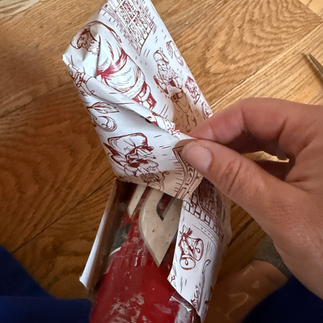
Wrap the Axe Head First.
Pick any wrapping paper you like and start by wrapping the axe head first. I had to do it twice because my first attempt was a total flop. Here are some pics from my second try, which turned out way better by wrapping the axe head this way, instead of going over the top with the paper (not recommended). Once the axe head was wrapped, I moved on to the handle, starting from the bottom up. I used strips of wrapping paper, kind of like wrapping a bat with grip tape. Sometimes I had to squish some extra paper as I rolled it, and it ended up looking pretty good. If I had ribbon, I’d wrap that over the paper on the handle to hide any flaws, again, wrapping it like grip tape on a bat all the way up to the axe head.


Secure the wrapping
I used quite a bit of tape. Packing tape was my best friend, and, again, someone else will probably have a better way of wrapping this, but this is just how I did it the second time, much better than the first time. Make sure to also make a little circle of wrapping paper to tape to the end, to cover the knob.
Adding Festive Christmas Touches
To make the wrapped bat fit the Christmas theme, add some holiday decorations to your liking.
Ribbon bow: Tie a big red or green bow where the blade meets the handle. Or wrap ribbon along the handle all the way up to the axe head, like bat wrap in a sense, but all the way to the top.
Gift tag: Attach a Christmas-themed tag with a personalized message.
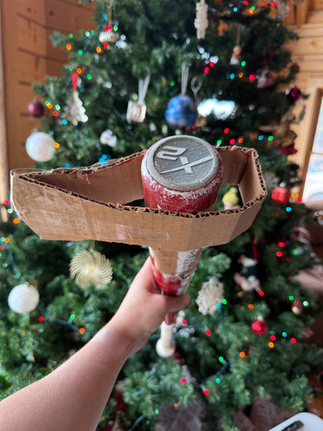
These touches make the gift festive and visually appealing without overpowering the axe design. For me...I just stuck it under the tree but I would love to see your photos of finishing touches you put on it. My little mini aussie wanted to pose in the picture too hee hee.

Tips for Wrapping and Presentation
Work on a flat surface to avoid wrinkles and keep the wrapping as neat as possible, but it doesn't have to be perfect by any means.
Be patient with the blade attachment; it’s the most delicate part that makes the axe look real. You can see the finished product below.
Safety and Practical Considerations
While wrapping creatively, keep in mind:
Please don't cut yourself, especially if using a box cutter.
If using a box cutter to cut the cardboard also be mindful of what is underneath, so you don't scratch the surface of a kitchen table, counter tops, or wood floor.
Above all else, make it unique by putting your own spin to this. Would love to see some of your Axe bats when they are all done.
Final Thoughts on Wrapping a Bat as an Axe for Christmas
Wrapping a bat to look like an axe is the ultimate disguise for those bats under the tree! It takes a little patience and a bit of work, but the finished product is awesome and will hopefully fool any little eyes or hands you see eyeing what is under the tree.
If this tutorial has helped you at all, please leave a comment below and also let us know what worked better for you, or post pics of how yours turned out! Love to see all the creativity come out.


Comments